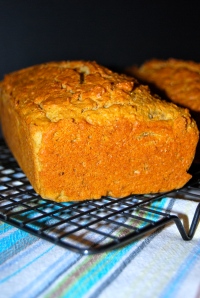
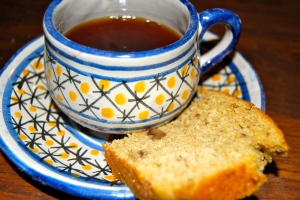
Not very far and it won’t look terribly much different but it gives me a few more options for my blog. If you already get my blog via email you won’t need to do anything, you will still get it. If you don’t subscribe but would like to have a look at my blog go to juliaspantry.com.au.
A Library of Recipes
Taking up space on my kitchen bench top is a growing pile of books, bits of paper and magazines. This is my ‘working pile’ – a list of things to make for the markets coming up, recently cut out recipes and food articles sourced from newspapers and magazines and the latest edition of food magazines and books with recipes that I’m going to try soon! It doesn’t take too long before this pile becomes very unwieldy and requires sorting out. It’s quite a time consuming job, not only because of the size of the pile but also because I rediscover what’s in the pile and it takes time rereading the recipes and articles, sorting into categories and writing lists of what I’m going to make next and the accompanying shopping lists. Continue reading
Filed under Bits & Pieces that Don't Fit Anywhere Else
Everything Mulberry at this Week’s Market
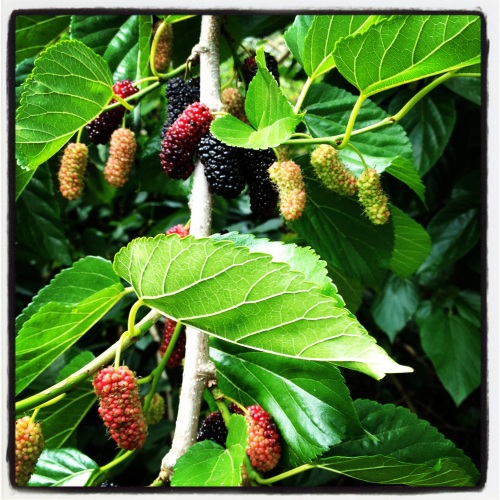
The short mulberry season is upon us and I have been busy picking mulberries this week (with very stained hands and nails to prove it). The tree is absolutely laden so there is plenty to share with the birds and the possums. This week you will be able to choose from some delicious mulberry cakes and crumble as well as some other favourites.
Don’t forget to leave me a message or send me an email if you don’t want to miss out.
This week’s cakes
- Mulberry Crumble
- Mulberry & Cinnamon (including a gluten free version)
- Chocolate and Beetroot
- Chocolate Chip Quinoa Blondies (Gluten Free)
- Lemon Olive Oil
- Zucchini, Cranberry & Walnut
- Rocket & Pecorino (Savoury)
This week’s tarts
- Rocket & Leek
- Asparagus & Ricotta
- Roast Mushroom
- Apple, Pumpkin & Caramelised Onion
- Chilli Bean & Cornbread (Gluten Free)
- Chickpea Rolls
- Salted Caramel
- Lemon
Other bits and pieces
- Mushroom Pate
- Oat & Seed Cripsbreads
- Oatmeal Biscuits
- Apple & Mulberry Crumble
- Lemon Butter
- Meringues (Chocolate & Cinnamon and Lemon Curd)
- Scones (Plain, Cranberry & Lemon)
Filed under Moggill Markets @Brookfield
Strawberry Jam with Asian Herbs
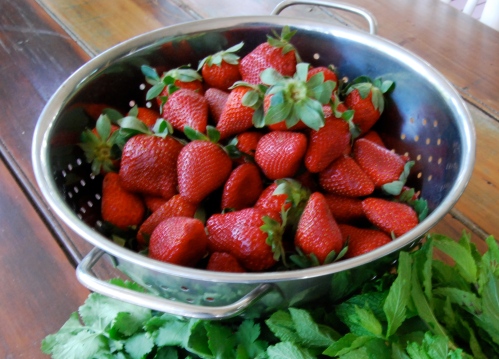
There is a glut of strawberries at the moment. Some farmers are choosing not to pick as the return just doesn’t over the cost of getting the fruit to market. As a result strawberries have been very plentiful and cheap in the shops with prices as low as 99 cents a punnet. However, if you can buy strawberries directly from the farmer you are ensuring that they are at least getting some return for their labour. At the Moggill Markets we have the Hendriksens who own Sunrise Strawberries and they would have to be the best strawberries around. Plump, juicy and flavoursome, I have yet to find a rival for these strawberries. According to the Hendriksen’s this has a little to do with the variety they grow but mostly it is to do with the fact that the strawberries are picked the day before the markets. As they age, strawberries loose their flavour so the just picked ones are the best if you can get them.
We have been doing our bit to eat our way through the glut. Smoothies, crumbles and cakes have all featured recently along with strawberry sauce and of course strawberry jam. Strawberry and rhubarb jam is great, as is strawberry and vanilla. Looking for something a bit different, I was inspired by a recipe in Liana Krissoff’s book Canning for a New Generation. This book has some interesting recipes for jams and pickles as well as some ideas for how to use them in other recipes.
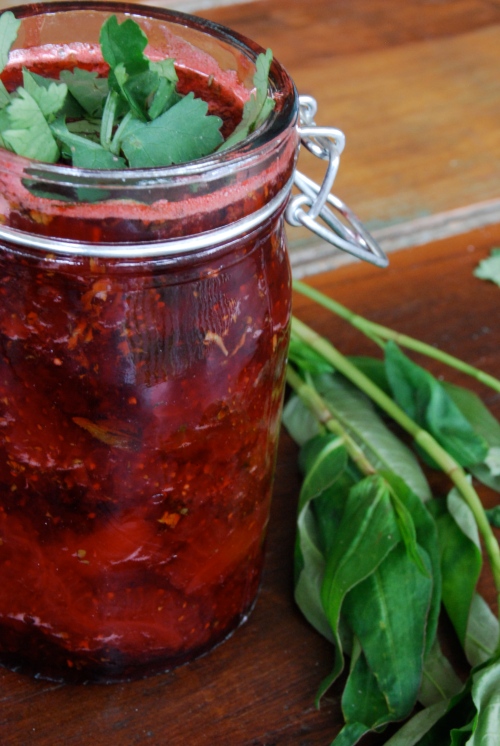
The ratio of fruit to sugar in this recipe is quite low so it won’t set quite as firmly as you would normally expect a jam to. Cooking the syrup separately to the strawberries ensures that the fruit retains its shape and colour. As a result this jam is a beautiful vibrant colour and the herbs compliment the strawberries perfectly adding a freshness to the jam.
Strawberry Jam with Asian Herbs
- 1.5kg strawberries, hulled and chopped (The strawberries in this jam won’t break down much in the cooking so you need to cut them to the size you prefer. I like a chunkier jam but if you prefer finer pieces cut the strawberries smaller.)
- 2 cups sugar
- juice of 1 lemon
- 2 tablespoons coriander, chopped
- 1 tablespoon mint, chopped
- 1 tablespoon Thai basil, chopped (Vietnamese mint is also suitable)
Place the strawberries and the sugar in a large pan and stir over a medium heat until the sugar dissolves. Bring the mixture to the boil and then simmer for 5 minutes. Strain the strawberries through a sieve or colander catching the liquid in a bowl. Return the liquid to the pan and bring to the boil. Continue to boil until the syrup is reduced to about 2 cups. It should take about 20 minutes.
Return the strawberries and any juice to the pan, add the lemon juice and simmer for about 15 minutes. At this stage add a teaspoon of jam to a saucer that has been in the freezer to check that it is somewhat firm. It won’t set as you would normally expect a jam to but it will thicken. Turn off the heat and skim off any scum that might have formed. Stir through the chopped herbs and bottle into sterilised jars. This will make about 4 cups of jam.
Filed under Jam
Kedgeree
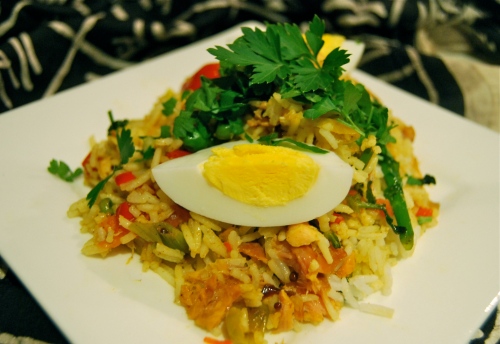
According to Albert Jack, author of the very interesting book What Caesar Did for my Salad, Kedgeree is a traditional dish of rice and lentils or rice and beans that can be traced back to the fourteenth century. Kitachari was a staple of the Indian diet and was brought back to England by returning British colonials and evolved into something far more lavish, usually including smoked fish, hard boiled eggs, parsley and curry powder. With it’s name anglicised to kedgeree it became a classic of the Victorian breakfast buffet.
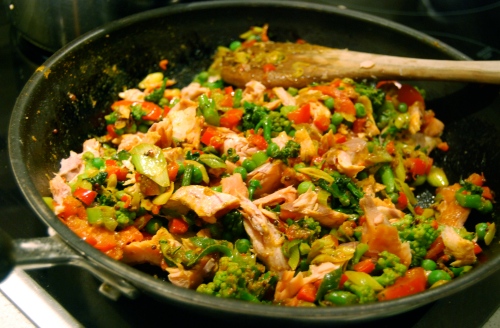
We don’t eat it for breakfast, rather I tend to make an even more substantial version with the addition of vegetables and have it for dinner. I also used hot smoked salmon as an alternative to the traditional smoked haddock. It doesn’t need any preparation other than breaking it into smaller pieces and has a fragrant, smoky flavour. Kedgeree is a flavoursome meal and the leftovers reheat well for lunch the next day.
Kedgeree
- 1 brown onion, finely chopped (you could use a bunch of spring onions or a leek if you prefer)
- 1 clove garlic, finely chopped
- 2cm piece fresh ginger, peeled and grated
- 50g ghee
- 1 tablespoon mustard seeds
- 2 teaspoons curry powder
- 5 cups cooked basmati rice
- 1/2 red capsicum, chopped
- 2 cups chopped mixed vegetables (use whatever you have in – peas, broccoli, cauliflower and green beans work well)
- 2 x 150g portions hot smoked salmon, flaked
- Juice of 1/2 lemon (or to taste)
- 4 hard boiled eggs, peeled and cut into quarters
- chopped coriander or parsley to serve
Heat the ghee in a large frying pan. Add the onion, garlic and ginger and cook until beginning to soften. Add the mustard seeds and the curry powder and stir for about a minute or until the spices are fragrant. Add the capsicum and remaining vegetables and continue to cook until tender but not soft. Add the smoked salmon and heat through gently. Add the cooked rice and mix thoroughly. Continue to heat gently until the rice is warmed through. Stir through the lemon juice.
Serve the kedgeree in bowls or on plates topped with hard boiled egg quarters and sprinkled with coriander or parsley.
Filed under Savoury meals
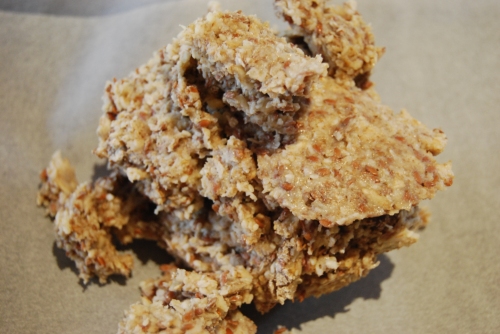
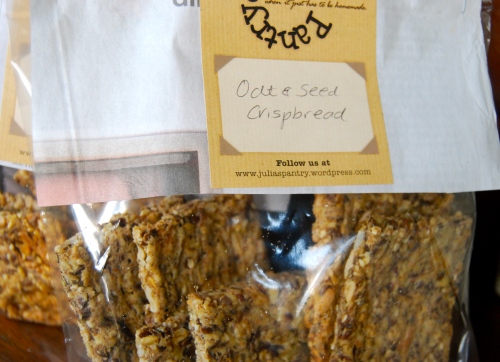
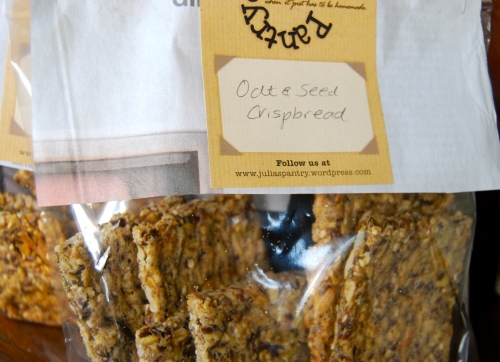
Oat and Seed Cripsbreads
I try to buy as little preprepared food as possible. Some years ago when we were both working long hours and the girls were younger we used to eat quite differently. With school lunches it’s easy to fall into the trap of buying the little prepacked snacks and then to sit down to a frozen meal for dinner. We had never eaten that way when we were growing up so in the end it wasn’t too difficult to go back to basics and to start making things again. I will admit that significantly reducing my working hours also helped. When you have more time, cooking becomes a real pleasure rather than a chore. In the end I didn’t stop at cooking dinner – today I make a fairly large percentage of what we eat. I developed a passion for preserving, I bottle whatever is in season, I make jams and cordials, sauces and pastes. I’ve had disasters making vinegar (which I have yet to perfect) and some success making cheese. I bake bread, biscuits, cake and crackers.
This cracker recipe I came across last Christmas while we were staying in Queenstown, New Zealand. At the time I had been trying a few different cracker and crispbread recipes but was having difficulties getting the texture right. This recipe was in a magazine, the name of which I can’t remember and neither can I remember the originator of the recipe. I scribbled the recipe on a paper bag not thinking that sometime down the track I would be sharing it on my then non existent blog. This is a shame as the developer of this recipe really deserves the credit for these fabulous crackers.
I have a hard time keeping up the supply of these crispbreads, the more I make the more they get eaten. The quantities here are for double the original recipe but as they keep forever there seems to be little point in making any less.
Oat and Seed Crispbreads
- 200g oats (not quick oats)
- 100g rye flour
- 100g Sunflower seeds
- 100g linseeds
- 50g sesame seeds
- 1 teaspoon salt
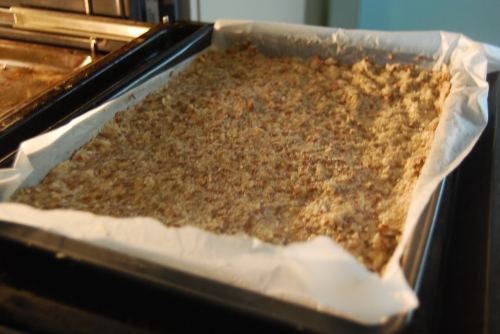
Line two 20 x 30cm (approximately) baking trays with baking paper. Preheat the oven to 140 degrees.
Put the oats in a saucepan and cover with water. Bring to the boil and simmer for about 3 minutes. Drain the oats and then add the remaining ingredients. Stir until well combined. Let the mixture cool for a little while.
Spread half the mixture over each baking tray. The mixture is quite gluggy and I’ve found the best way to do this is to use damp hands to spread the mixture thinly.
Bake in the oven for 1 hour. remove from the oven and peel off the baking paper. Cut or break the mixture into approximately 12 pieces. Return them to the oven with the side that had been attached to the baking paper facing upwards. Bake for another 40 minutes.
Take care not to over bake the crackers as the linseeds in particular tend to go bitter if over cooked. You could try the same recipe using buckwheat flour instead of rye. You could also add some herbs such as rosemary or thyme and some black pepper, even some chilli.
Filed under Pantry Staples
Tasty Treats at the Moggill Markets this Saturday
This week is another busy one including a flying visit to Monto to run a cookery judges course for the QCWA. There are very few younger people getting involved in judging cakes and preserves and it is increasingly more difficult for local shows to find judges, which is a shame as the popularity of cooking competitions seems to be having a bit of a resurgence. The Judges Accreditation course run by the QCWA tries to go someway in offering training for people who might be interested. Of course I will be able to fit in the cooking for the markets so there will be plenty of things to choose from.
This Week’s Cakes
- Apple & Cranberry
- Banana & Coconut
- Lemon Poppy Seed
- Walnut & Fig
- Pumpkin Crumble (also available in a gluten free version)
- Chilli Cornbread
- Carrot Quinoa Bar (Gluten free)
This Week’s Tarts
- Spinach & Ricotta Snails
- Potato, Onion & Brie
- Gorgonzola & Pear
- Zucchini, Haloumi & Herb
- Lentil with Sweet Potato Mash
- Chickpea Rolls
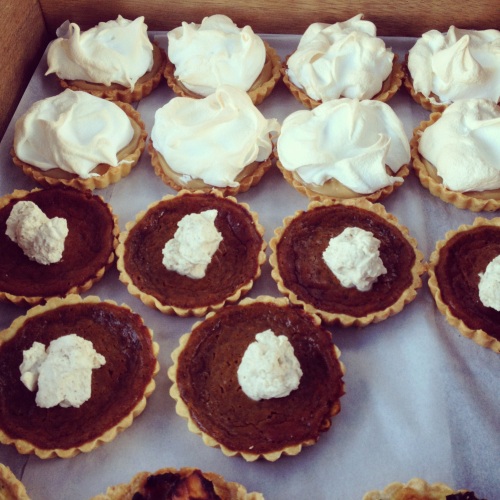
- Salted Caramel Meringue
- Apple & Mascapone
Scones this week include plain, cranberry and fruit mince and there will be some Oat and Seed Crispbreads available as well. Don’t forget that if you want to make sure you don’t miss out to leave me a message.
Filed under Moggill Markets @Brookfield
Fruit Mince
September is a good time to be making fruit mince. Not only will you feel really good because you have started planning for Christmas (!) but you will be rewarded with a much better product when you come to use it in a few months time.
Growing up we always called fruit mince mincemeat, but in recent years it seems that fruit mince has taken over as the preferred name, probably to avoid confusion. Fruit mince did originally contain diced or finely chopped meat, often beef. Very early recipes included a mixture of meat and fruit and vinegar or wine which was then used as a pie filling.
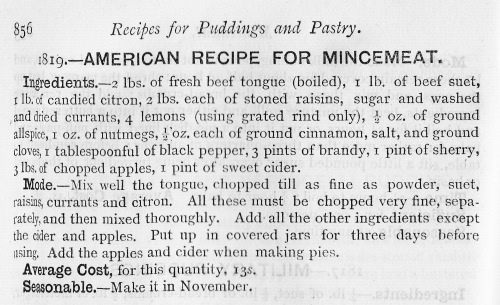
My 1888 edition of Mrs Beeton’s Book of Household Management includes a number of mincemeat recipes. This American Recipe for Mincemeat includes boiled beef tongue as well as beef suet. By this stage distilled spirits such as brandy had replaced the vinegar or wine as the preserving liquid and sugar was added to make it more of a sweet dish than a savoury one.
It probably wasn’t until the mid twentieth century that mincemeat was used to describe a mixture that didn’t include meat, although it invariably still included suet.
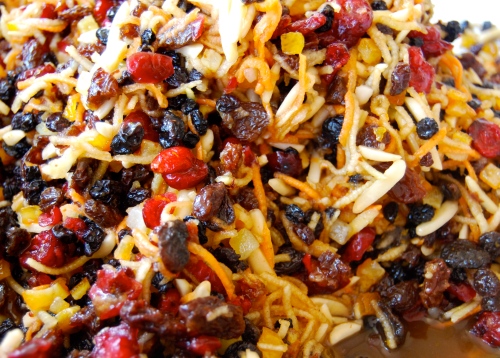
Fruit Mince is very simple to make – it really is a matter of chopping, grating and mixing and then leaving it to mature and mellow. By the time you use it in December the dried fruit will be plump from the alcohol and juice from the apples and citrus fruits, the liquid will by syrupy and the alcohol will have lost its sharpness and instead will be smooth and luscious. Hopefully after your Christmas cooking you will have some left over because it really is good to use all year round.
Fruit Mince
- 250g raisins (I generally chop these in half so that they are about the same size as the sultanas.)*
- 250g sultanas (You could choose to chop these as well so that all of the dried fruit is about currant size, but I prefer it chunkier)
- 250g currants
- 250g dried cranberries
- 200g mixed peel (lots of people don’t like mixed peel, so feel free to leave it out)
- 125g slivered almonds
- 600g Granny Smith apples, peeled, cored and coarsely grated
- 1 large carrot, peeled and coarsely grated
- 250g frozen butter, grated (you can use suet instead of the butter. If you do you will probably need to order it in advance from your butcher)
- Zest and juice of 1 orange
- Juice of 2 lemons
- 500g dark brown sugar
- 1/2 teaspoon nutmeg
- 1/2 teaspoon cinnamon
- 3/4 cup brandy
- 1/4 cup dry sherry (you could use all brandy or whiskey instead if you prefer)
Mix the dried fruit and grated butter in a large bowl. Add the remaining ingredients and mix until well combined. Leave the fruit mince to stand in a covered bowl for two days, stirring it frequently. Transfer the fruit mince to sterilised jars and store it in a cool, dry and dark place. Leave for at least one month before using, but it will only improve with age. If you live in a particularly humid place, where Christmas coincides with Summer you might want to consider storing your fruit mince in the fridge.
* Throughout her book, Mrs Beeton provides snippets of information that would be useful to someone keeping house. In relation to raisins she says:
Raisins are grapes, prepared by suffering them to remain on the vine until they are perfectly ripe, and then drying them in the sun or by the heat of an oven. All the kinds of raisins have much the same virtues; they are nutritive and balsamic, but they are very subject to fermentation with juices of any kind; and hence when eaten immoderately, they often bring on colics.
Filed under Sweet treats
Lemon Ricotta Cake
This time last year Michael and I were in Italy. We landed in Milan and spent the next ten days meandering our way to Orvietto in Umbria via Bolongna and Siena. It was from Orvietto that we were starting our 12 day walk to the coast and the island of Giglio. The weather was warm and dry (except for a overnight storm in Bolsena that bought down centuries old trees, but we happened to sleep through), the walking was perfect, the accommodation varied (farms, converted palaces, small family run hotels) and the food magnificent. Each day we walked about 20-25 kilometres, traversing old pilgrim routes, etruscan walkways and through small villages and towns. We picked fresh figs and walnuts from the trees on the side of the roads and I lamented the fact that I couldn’t bring home the rose hips and elderflowers that were growing wild and seemingly unnoticed by anyone. We ate some great food – nettle and ricotta ravioli, cauliflower carpaccio with poached egg, stuffed cuttlefish, wild boar and rabbit, faro in all sorts of guises, fresh truffles and porcini mushrooms and of course good wine to accompany it all.
For a cake lover like myself, one of the best things about eating in Italy was that it was possible to eat cake for nearly every meal, including breakfast. At various places that we stayed I managed to gather a collection of recipes for cakes suitable for breakfast. These invariably included citrus, almond meal or ricotta. I was reminded of these cakes today when I was looking for something to make for Father’s Day lunch that would use up the ricotta I had in the fridge and preferably some of the many lemons I also have. This lemon ricotta cake is moist and dense but at the same time quite light and it’s not overly sweet. You could quite easily substitute the lemon for orange.
I can’t quite bring myself to eat cake for breakfast when I’m at home so we had this for lunch with some macerated strawberries and a dollop of whipped cream but when you see the ingredients and realise that there isn’t anything that is really too bad for you, you might be tempted to have it for breakfast.
Lemon Ricotta Cake
- 450g ricotta
- 3 large eggs, separated (a lovely customer at the markets gave me a dozen duck eggs on Saturday which are perfect for this cake. Duck eggs are higher in protein than chicken eggs meaning that cakes tend to rise more – and why they are highly sought after for making a sponge cake. They also tend to be bigger than chicken eggs which may need to be taken into account, but for a recipe such as this it doesn’t make much difference)
- 100g caster sugar
- 250g almond meal
- zest of 3 lemons
- juice of 1 lemon
- seeds from 1 vanilla pod
Preheat the oven to 170 degrees. Line a round springform tin with baking paper (about a 23cm one).
Put the ricotta, egg yolks, lemon zest, juice and vanilla in a food processor and whizz until it is mixed and smooth. Add the sugar and almond meal and mix again until well combined. In a separate bowl whisk the egg whites until stiff and then fold the whites through the ricotta mixture. Pour into the prepared pan and bake for about 50-60 minutes. If the top looks to be getting too brown, cover with alfoil. The texture of this cake is similar to a baked cheese cake, so you will be able to tell that it is cooked when it is set, rather than testing with a skewer.
Serve with strawberries or other berries and store any left overs in the fridge.
Filed under Sweet treats
Spring at the Moggill Markets
The calendar hasn’t even flipped over to September yet, but already you can feel the warmth in the air. I’m certainly not complaining – I’m more than ready for a bit of hot weather.
As well as purchasing some of the usual fare this Saturday, it is also the perfect opportunity to get something special for Dad as Father’s Day is on 2 September. I have made some delicious Cheese Pots and some Mushroom Pate. There are also some Oatmeal Biscuits and Oat and Seed Crispbreads which are perfect with the cheese pots and the pate but are also great with other cheeses. I’ve also made some quince paste which goes well on a cheese board. If Dad has a sweet tooth try the Italian Marble Cake – spices and a hint of rum.
If you would like to order something to make sure you don’t miss out leave me a message.
This Week’s Cakes
- Banana and Date
- Apple, Orange & Cardamom
- Ginger Syrup
- Italian Marble
- Coffee Streusel
- Coconut & Apple (Gluten Free)
- Raspberry & Coconut Slice (Gluten Free)
This Week’s Tarts
- Onion, Walnut & Blue Cheese
- Pea, Mint & Goats Cheese
- Olive & Roast Tomato
- Vegetable Rolls
- Lentil Shepherds Pie
- Baked Ricotta Stuffed Eggplant Rolls
- Salted Caramel Meringue
- Prune & Port
There will also be plain, cheese and chive and wholemeal walnut and date scones.
Filed under Moggill Markets @Brookfield
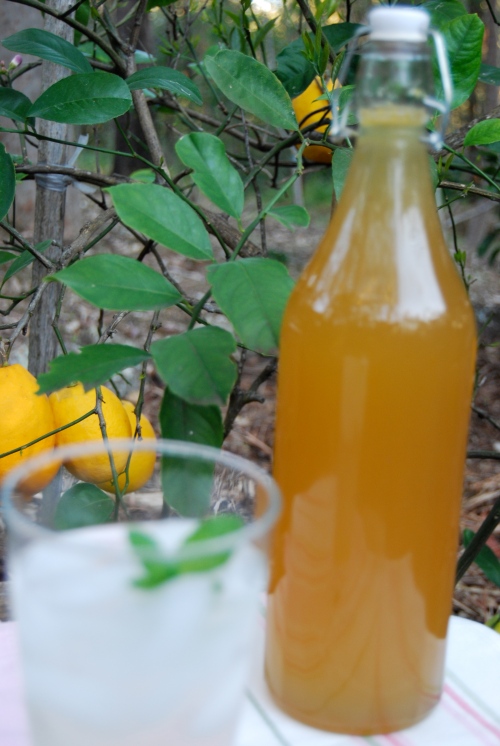
Lemon Barley Cordial
Apparently the Greeks were to first to think of boiling grain in water and drinking it. But really it was the British who bought barley water to the world. Robinsons Barley Water is perhaps the best known brand, possibly as it has had a long association with Wimbeldon. Barley water was also thought to be good for invalids as it provided some nutrition and hydration to those who had lost their appetite. There are all sorts of other claims associated with barley water from reducing wrinkles to soothing an inflamed stomach. I can’t substantiate any of these claims – I just drink it because I like it.
Barley water would originally have been intended to be drunk as it was made but making it as a cordial concentrate means that it keeps for much longer and you can dilute it as you go.We don’t drink a lot of soft drink at home. I hate the fizz and so tend to drink cordial instead. Before anyone goes mad about the amount of sugar in cordial we’re not talking about litres a day and not only that but homemade cordial has no colours or artificial additives to make it glaringly bright or to keep it shelf stable for ever and a day. I store the cordial I make in the fridge – the humid Brisbane weather isn’t particularly conducive to leaving cordials and the like on the pantry shelf and the colour isn’t florescent yellow, green or red. A glass or two each day won’t hurt.
Despite the title, the cordial I made todayis actually a lemon and lime one as I had quite a bit of both. I like my citrus things to have a good citrusy flavour and a real tang so if you like it a little mellower you may need to adjust the quantities of zest a bit.
Lemon (and Lime) Barley Cordial
- 500g pearl barley (I find this in the supermarket down the soup and tinned vegetable aisle)
- 3 litres water
- 10 cups sugar (I used a combination of white and raw sugar this time. Raw sugar adds a nice malty flavour but the browner colouring might be a bit off putting)
- zest and juice of 6-8 lemons (depending on size and your preference for zest. You can also use a combination of other citrus)
- 75g citric acid (from the baking aisle of the supermarket)
Add the pearl barley and the water to a large saucepan. Bring to the boil and simmer with the lid on for 40 minutes.
Put the remaining ingredients in a large bowl. Drain the barley retaining the water and pour over the sugar and lemon. Stir and cover and let sit for 24 hours. Strain and bottle. Store in the fridge for several weeks. To serve dilute with water or mineral water to taste.
This makes quite a thick concentrate so you won’t need to use a lot.
Asparagus, Brussels Sprouts, Cauliflower and more.
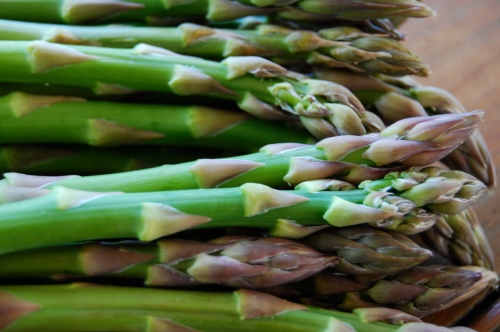
You know that spring is knocking on the door when the new season asparagus hits the markets. All through winter you see asparagus on the supermarket and green grocers shelves from Peru and the Philippines, but despite the fact that I love asparagus I refuse to be tempted. One of the joys of eating locally and seasonally is the anticipation of new season produce. Well known American chef Mario Batali was quite right when he said:
“You know when you get your first asparagus, or your first acorn squash, or your first really good tomato of the season, those are the moments that define the cook’s year. I get more excited by that than anything else.”
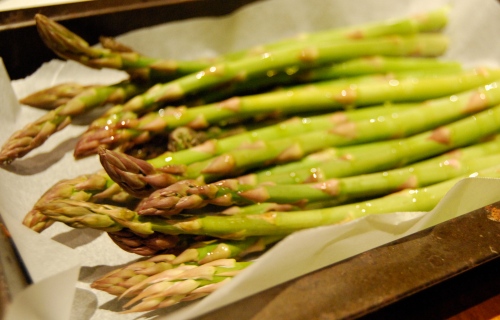
So now I have two bunches of the finest asparagus just waiting to be eaten. Contemplating how to eat it has been the hardest – a simple quick pan fry, or steamed and served with a poached egg. In the end I decided to bake it as the oven was already on roasting the freshly dug kipfler potatoes tossed in new garlic and rosemary from the garden. A baking tray lined with baking paper, a drizzle of olive oil and a grind of pepper, ten minutes in a 180 degree oven and they’re ready.
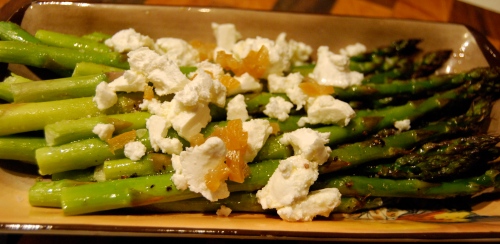
I finished them off with a sprinkle of sea salt, a crumble of feta cheese and a few bits of preserved lemon.
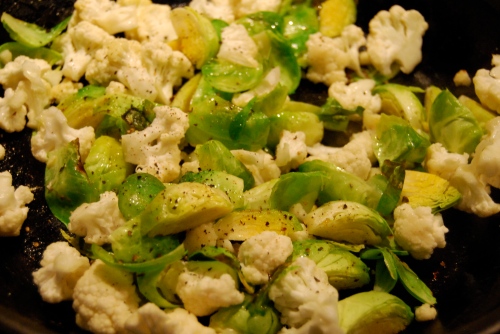
We also had some pan fried brussels sprouts and cauliflower, simply seasoned with olive oil, salt and pepper and steamed baby carrots. In the end the veggies were the stars of the meal and the pork belly almost an after thought.
Filed under Vegetables
Tasty Delights for this Week’s Moggill Markets
This is the last winter market for the year – it won’t be long before we’re not complaining about the cold weather when we’re setting up but rather looking for inventive ways to keep the sun off the produce. Already it’s lighter earlier and the first wave of shoppers are hitting the markets well and truly by 6am. You don’t have to be there that early to make sure you get the pick of the produce. If you’re planning a more leisurely start to your Saturday let me know what you would like me to put aside for you and that way you’re guaranteed not to miss out.
This Week’s Cakes:
- Cider, Apple & Fig
- Pear & Cardamon
- Banana & Peanut Butter
- Zucchini & Sweet Potato
- Pumpkin Chai (gluten free)
- Plum & Polenta (gluten free)
- Cheese, Olive & Herb (savoury)
This Week’s Tarts:
- Chilli Bean and Cornbread (gluten free)
- Curried Vegetable
- Onion & Smoked Cheddar
- Fennel, Kale & Goats Cheese
- Chickpea Rolls
- Salted Caramel Meringue
- Spiced Pumpkin
- White Chocolate & Lime
Filed under Moggill Markets @Brookfield
Apple & Strawberry Crumble
I really like dessert. I’m one of those people who always looks at the dessert menu first before deciding what to order. At home we have abandoned modern dietary thinking that dessert should be a sometimes treat and more often than not we eat dessert. And I’m not talking about a bowl of ice cream sort of dessert – that to me isn’t real dessert. Nor am I talking about elaborate special occasion desserts just good, simple, tasty desserts that nicely round off the evening meal. Golden syrup dumplings, Apple Brown Betty, rice pudding (also great for breakfast!), that sort of thing. We don’t of course eat these things in the middle of summer (except perhaps rice pudding – it’s good all year round) so winter is a great time to make the most of puddingy type desserts. One dessert that we have frequently, probably at least once a fortnight is a crumble of some description. It’s relatively quick and easy to make and the variations are endless depending on what’s in season. Recently we have had pear and chocolate crumble, a tropical crumble made with pineapple and passionfruit, apple and passionfruit and most recently apple and strawberry.
Writing a recipe for crumble is a little difficult as I make it up as I go along and there really isn’t too much that can go wrong. You can adapt it to what you have in the fruit bowl and the pantry. I like a lot of a fruit and a medium amount of crumble but you can adjust this to your preferences. And I like a crumble that has a bit of body so I tend to use wholemeal flour, at least in part and I generally add oats, sometimes some coconut or some nuts. This is my stab at a recipe for the Apple and Strawberry Crumble I made.
Apple & Strawberry Crumble
- 5 apples, peeled, cored and cut into slices
- 2 tablespoons sugar
- 250g strawberries, hulled and cut into half
- 1/2 cup wholemeal plain flour
- 1/4 cup self raising flour
- 100g butter
- 1/2 cup brown sugar
- 1/3 cup shredded coconut
Place the apple slices into a saucepan with the 2 tablespoons of sugar and about 1 tablespoon of water. Cook over a medium heat until apples are soft. Remove from the heat and stir through the strawberries (as a much softer fruit the strawberries will cook enough just in the oven). Transfer to an oven dish. Preheat oven to 180 degrees.
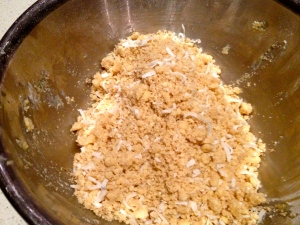
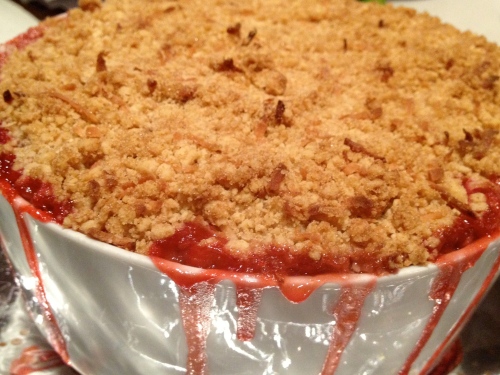
To make the crumble, add the flours to a bowl and rub in the butter until it resembles breadcrumbs. Stir in brown sugar and coconut and sprinkle over the top of the fruit. Pat down a little, but not too firmly. Put the dish on a baking tray covered in foil (the juice from the fruit invariably dribbles over the bowl and this makes the oven much easier to clean). Place in the oven and cook for 20-30 minutes or until the crumble is golden and the fruit juices are bubbling slightly. Serve with ice cream or custard.
Filed under Sweet treats
QCWA at the Ekka
Many people are surprised when I tell them that I belong to the Queensland Country Women’s Association. There are lots of perceptions about the QCWA that don’t always match the reality. Most people you speak with think that the association is for old ladies, who live in the country and cook and knit. There are of course some of these but the largest branches are in Brisbane and on the Gold Coast, there are lots of younger women who are members and there are no prerequisites for cooking, knitting or any sort of craft. Most of the women I speak to join because they want to make a contribution to their local community and to make new friends.
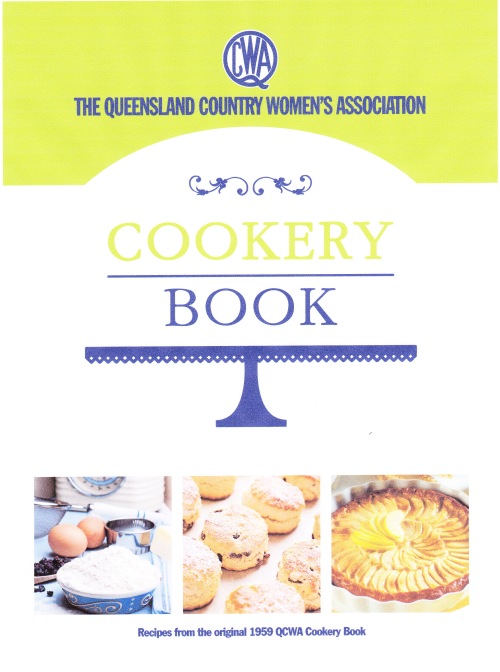
One of the projects that I have recently been involved in has been the rewriting of the QCWA Cookery Book. The book was originally compiled in 1959. Over the years it has had a number of reprints and before reprinting it this time we decided to review the book to make it more appealing to today’s cooks. The recipes were converted to metric measurements and in many instances the instructions were rewritten. In the 1959 version it was assumed that cooks making the recipes would know what to do and as a result much of the detail such as tin sizes and oven temperatures was left out. That knowledge doesn’t necessarily exist today so we thought that it was important to make the recipes easy to follow and give cooks a good chance of success.
The original version included information about hostessing which was removed in subsequent versions, but in this most recent reprint has found its way back into the book. These notes and the original advertisements all tell a great story about life in the 1950s and we thought it was important to include them. Some of the recipes are very 1950s – they seem to have a fascination with all things jellied but there are 100s of recipes in there that are still as relevant today as they were then.
More details about purchasing the QCWA Cookery Book can be found on the QCWA website. It is also for sale at the QCWA Tea Rooms at the Brisbane Exhibition. The QCWA has been running a refreshment stand at the Ekka since 1925. State Archivist Norma Lovelace, the Tea Rooms Convenor Mary Martyn and I had a chance yesterday to speak with Neroli Roocke from ABCs Country Hour about the QCWA at the Ekka. If you have a chance you can read and listen to the story here.
The ladies at the tea rooms serve freshly prepared food, you can buy a QCWA Cook book or some homemade jam, so if you have an opportunity visit them under the grandstand.
Filed under Bits & Pieces that Don't Fit Anywhere Else
What’s Cooking at the Moggill Markets on Saturday?
The time between markets seems to go very quickly – one market has barely finished and planning for the next one is well underway. The days have been beautiful in the last week – cold mornings to start with (not all that pleasant for the early morning market starts) but have then warmed up to glorious winter’s days. Hopefully Saturday won’t be any different.
This Saturday there are a couple of new cakes to try. You can choose from:
- Ginger Syrup
- Sticky Chocolate
- Banana, Raspberry & Coconut
- Pumpkin, Walnut & Raisin
- Rocket & Pecorino (this is a great savoury loaf which is perfect at this time of year with soup)
- Lemon Drizzle
- Zucchini & Raisin
The last two are gluten free. There will also be a couple of new tarts as well as some favourites.
- Mexican Egg
- Fennel, Kale & Goats Cheese
- Vegetable & Lentil with Sweet Potato
- Carrot Galette
- Mixed Mushroom
- Quinoa Stuffed Capsicum
- Salted Caramel Meringue
- Bakewell (homemade strawberry jam on the base covered with an almond sponge. An old English recipe that is delicious)
There will be plain, cranberry and savoury olive and feta scones as well as some gingernut biscuits. Lots of things to choose from. If you want to make certain that you don’t miss out, leave me a message and I can put it aside for you.
Filed under Moggill Markets @Brookfield
Kale Crisps
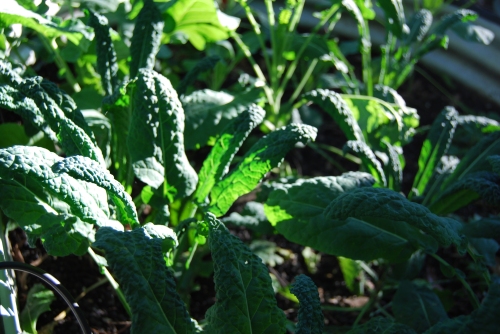
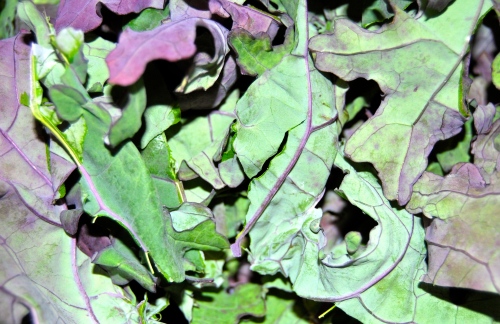
Something that has appeared at the markets during Winter over the past couple of years is Kale. I make the most of it while it is around and this year and it has become one of my new favourite winter vegetables. I have even had some success in growing the Tuscan Kale. At the markets you can also buy the Red Russian Kale which looks quite different. Thinly shredded it is great pan fried with sauteed onions, garlic and hazelnuts, a sprinkle of good sea salt, lots of pepper and a drizzle of olive oil or with some lemon zest and a squeeze of lemon juice.
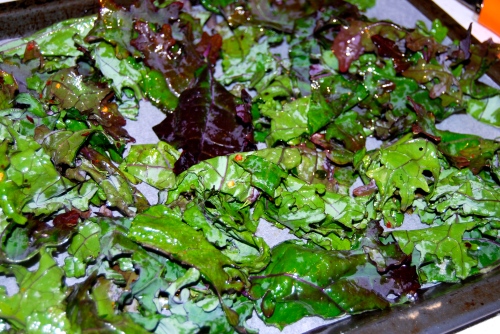
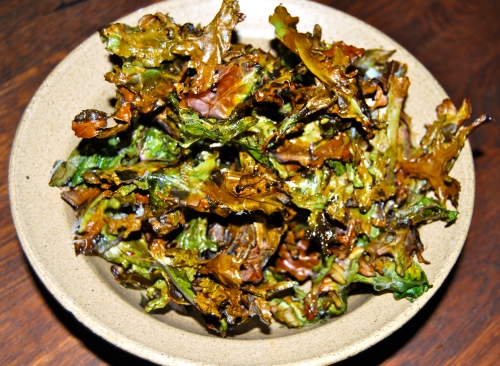
It is also a great snack food with the added bonus of being nutritious. To make kale crisps you need a bunch of kale. Remove the central stem and tear the leaves into smaller pieces. Toss the leaves with a tablespoon of olive oil, sea salt and freshly ground pepper and spread them out on a baking tray. A sprinkle of chilli flakes is also a great addition.Preheat the oven to 180 degrees and bake the kale for 10-12 minutes. Remove from the oven and cool before eating.
Try not to over cook the crisps as they tend to go slightly bitter if they are over baked.
A Market Bounty
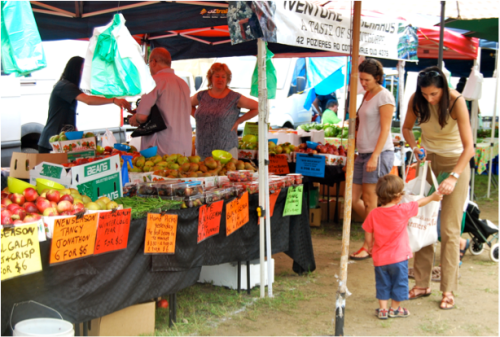
The pantry had been a little bare of late so it was great to get to the markets on Saturday and stock up. It was a glorious day. After the recent rain it was nice to see some sun and the crowds were certainly out enjoying it.
So what did I buy?
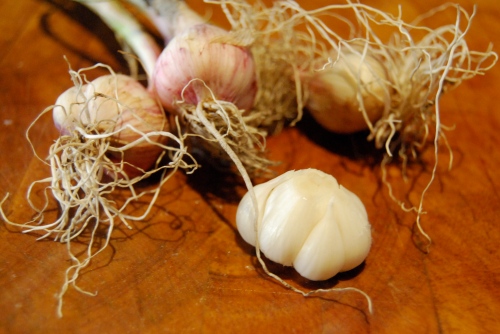
The very first of the new season’s garlic. I love this. The bulbs are small and compact and there is no need to peel them, just remove the outer skin and then chop the little, perfectly white cloves.
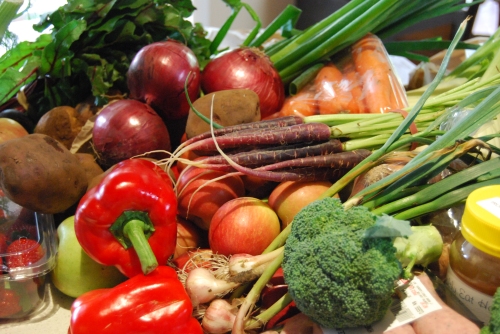
Fennel – lots of fennel. At the end of the market, one of the stall holders was giving away her left over fennel. After a bumper crop, she really didn’t want to take the remainder home. So after having already bought a couple of bulbs, I ended up with a dozen more. We eat quite a lot of fennel but trying to use that much was a bit daunting, so I managed to give quite a few bulbs away. It wasn’t as easy as it sounds. Nearly everyone I approached had never cooked it and didn’t know what to do with it. Fennel is really versatile, you can bake it, make a gratin with it, finely shred it as part of a salad, or make it into a soup, which is what I have done with a couple of bulbs.
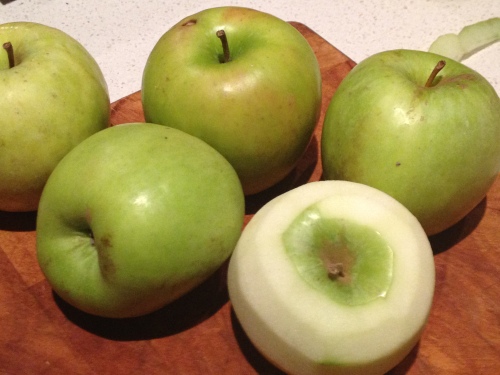
Apples – Pink Lady, Granny Smiths, Lady Williams and Fuji’s. Different apples for different uses. The Granny Smiths I generally cook with and a couple have already made in into the fennel soup. Pink Lady’s I also cook with a bit but they are a really good eating apple. The Lady Williams, I hadn’t tried before. An old variety, they are the genetic base for a number of the newer varieties. A red, crisp and slightly tart apple they are really delicious.
Add to that some strawberries, purple carrots, beetroot, cauliflower, ruby sweet potato and onions I think I’m set for a couple of weeks.
Filed under Moggill Markets @Brookfield
At the markets this weekend
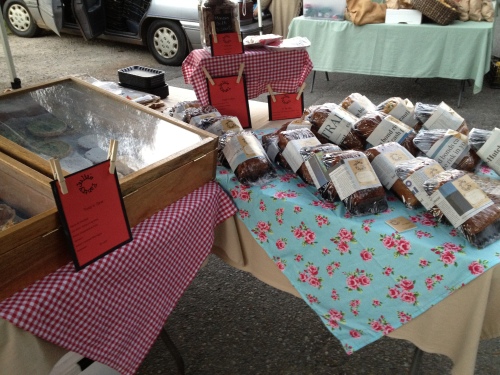
Although I have only missed one market it seems like an age since I have been at the Moggill Markets. I have been making good use of the short break and my stall has had a bit of a mini makeover. Not only that but it will be looking slightly Christmassy this market as of course it is our Christmas in July market. Plenty of entertainment for the whole family, good food, a great atmosphere and our brand new art and craft section.
On the menu this week are a few favourites and a couple of new things as well.
Cakes
- Coconut and Strawberry
- Apple & Molasses
- Coconut Bread
- Avocado & Walnut
- Cranberry & Apricot (gluten free)
- Banana & Blueberry (gluten free)
- Date & Ginger squares
Other Sweet Treats
- Mulled Wine Biscuits
- Mince Tarts
- Meringues
Tarts
- Roast Vegetable & Feta
- Apple & Cheddar
- Pumpkin & Sage
- Lentil Shepherds Pie
- Chick Pea Sausage Rolls
- Ricotta & Fruit
- Salted Caramel Meringue
There will also be freshly baked scones – plain, cranberry and wholemeal banana.
To eat in this market, there is a choice of coconut bread with lemon cream cheese, wholemeal banana scone with maple butter and mince pie and cream.
Things sell pretty quickly so if you want to make sure that you don’t miss out send me a message and I can put aside the bits and pieces that you would like to buy.
Filed under Moggill Markets @Brookfield
Mocca Eclairs
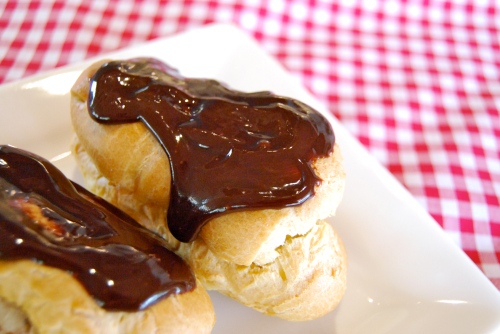
It is of course Bastille Day and what better way to celebrate than devouring a batch of eclairs. I need to confess straight up that choux pastry isn’t one of my regular things and the first pancake like batch was enjoyed by the chickens. The second batch however was a vast improvement and while my eclairs won’t win any prizes for looks they are very delicious. I’m not sure why the first batch didn’t work. I used the same recipe the second time and other than beating the mixture for a little longer when adding the eggs, there wasn’t any difference in what I did. It certainly isn’t difficult to make – maybe a little fiddly but the results are certainly worth it.
These eclairs have a coffee custard filling and a chocolate icing, but you could really do lots of things with the eclairs. A strawberry or raspberry cream with a white chocolate icing would be fabulous and you don’t have to make the custard cream you could just fill them with whipped cream. I have cheated a bit here with the custard cream and made the custard with custard powder rather than making it from scratch but once the cream has been added you really couldn’t tell.
Mocca Eclairs
Choux Pastry
- 60g butter
- 3/4 cup water
- 3/4 cup plain flour
- 3 eggs lightly beaten
Coffee Custard Cream
- 2 tablespoons custard powder
- 2 tablespoons caster sugar
- 1 cup milk
- 2 teaspoons good quality instant coffee
- 300ml cream
Chocolate Icing
- 100g dark chocolate
- 15 g butter
- 2 tablespoons cream
Heat the oven to 200 degrees. Line a couple of baking trays with baking paper.
To make the choux pastry put the butter and water in a saucepan over a medium heat until the butter has melted and the mixture nearly boils. Remove from the heat and add the flour, stir to combine and then return the pan to the heat stirring the mixture with a wooden spoon until it comes away from the sides of the pan. Let the mixture cool a little. With an electric mixer add the eggs to the flour mixture a tablespoon at a time, making sure that they are well incorporated before adding more. The mixture should be smooth and glossy.
Fit a piping bag with a plain nozzle and pipe lengths of the pastry mixture onto the prepared trays. My eclairs were about 10cm long. Put them into the oven for 20 minutes then turn the oven temperature down to 160 degrees and cook them for a further 20 minutes or until golden. Turn off the oven and open the door a little and leave the eclairs in the oven to dry out a bit. Remove from the oven and cool.
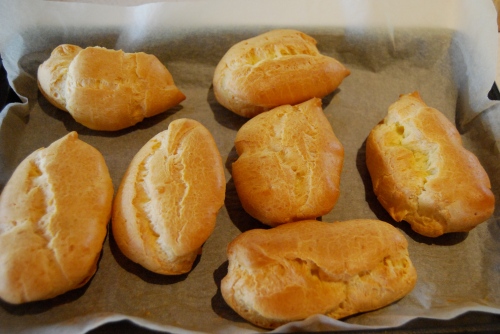
A vast improvement on the first batch which were very flat. I think next time I would pipe them in a thinner line.
While the eclairs are baking make the custard cream. Combine the custard powder, sugar and coffee in a saucepan. Gradually add the milk and stir over a medium heat until the custard thickens. It will be quite a thick mixture. Cover the custard with plastic wrap so that the plastic touches the surface of the custard. This will stop a skin forming on the custard and refrigerate for about 30 minutes. You don’t want it to cool until it is really solid. Beat the cooled custard mixture with an electric beater and then add the cream, continuing to beat until the mixture is the consistency of whipped cream.
To make the chocolate icing, add all of the ingredients to a small saucepan and stir over a low heat until the chocolate is melted and the ingredients are smooth and glossy. Cool a little before using.
To assemble the eclairs, cut the eclairs in half but not the entire way through the eclair. With a piping bag fill the centres with the custard cream and then ice the top of the eclair and voila!
Bon Apetite.
Filed under Sweet treats
The Girls…
When we first moved to our current residence almost seven years ago, one of the first things that we did was to get some chickens. We started with a fairly modest arrangement – 4 chickens in a metal semi-circular cage that could be wheeled around the yard to find a fresh spot for them. It wasn’t however, very practical. It was difficult to clean, hard to catch the chickens and there really wasn’t much room for them. So we upgraded to a custom built chicken coop with a fenced yard for them to run around in during the day before being safely locked away again at night. It wasn’t long before the yard underwent an expansion to what it is today – a fairly substantial area with an outdoor shelter and a series of branches which form a covered walkway from the outdoor shelter to the indoor area. This gives the chickens a means of escaping into their covered area should they need to. There have been some modifications – a series of wires strung across the closest trees in order to thwart the resident eagle and a barricade of sticks and logs to keep the foxes out. Since these changes we haven’t lost any chickens to the local predators.
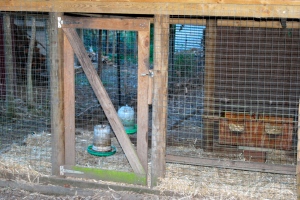
The rarely used chicken coop behind which is their enclosed yard. The choose not to spend too much time in here preferring to spend their nights roosting out in the elements.
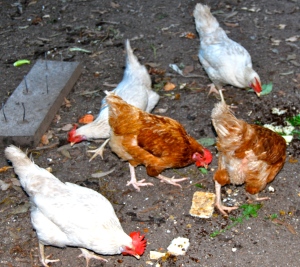
We currently have nine girls – four brown ones and five white ones. I don’t know what variety they are. They are just the ones that are available at the local produce shop and are chosen because they lay well. They make no use whatsoever of their luxurious shelter choosing instead to roost outside on the branches regardless of the weather. A couple of them choose to leave their enclosure during the day – flying over the fence and spending the day wandering around the garden. The others stay put and entertain the local brush turkeys who have come to think that they are also chickens. Surprisingly the chickens seem to tolerate them which is a bit unusual as chickens can be fairly vicious creatures sometimes.
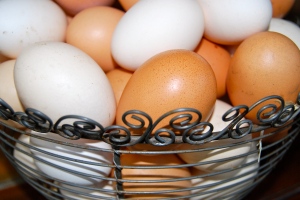
The Girls are laying well at the moment, we generally get eight eggs a day. There really is nothing like really fresh eggs. You are guaranteed perfectly poached eggs when you know when the egg was laid and while shelling a hard boiled egg might be more difficult when the egg is fresh this is a price I’m prepared to pay.
The culinary history of eggs makes fascinating reading. You local library might have a copy of Harold McGee’s encyclopaedia on ‘Food And Cooking’. Originally published in 1984 the book answers many questions about science and cooking. The most recent version printed in 2004 updates the original text incorporating information about ingredients we now take for granted but were rarely heard about in 1984 (think extra virgin olive oil and balsamic vinegar). He devotes an entire chapter to eggs – their biology and chemistry, what happens when you cook an egg and why sometimes you need to use a fresh egg and other times an older one is better. It makes for very interesting reading but be warned ‘McGee on Food and Cooking’ isn’t a light book and you’re in danger of substantial injury if you try and read it in bed.
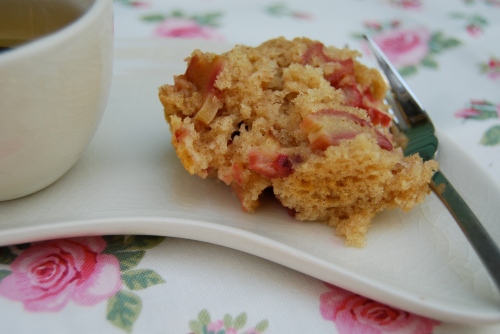
Rhubarb Muffins
We’re off to Hobart in a couple of days time and there are a few bits and pieces in the fridge that need using up before we leave. The veggies can all go into a soup and there are a few sticks of rhubarb that are looking a little worse for wear. There’s not really enough to do too much with so muffins it is. Rhubarb is one of my favourite things – crumbles, pies, cakes, in chutney, it is just delicious. These muffins, like all muffins are quick and easy to make and will freeze well, which is what I will be doing with these. Feel free to change the ingredients a bit. Rhubarb goes really well with ginger so if you have some glace ginger in the pantry add that. It is also really good with strawberries so you could do half rhubarb, half strawberries. Just cut the strawberries in half before adding them to the mixture.
Rhubarb Muffins
- 2 cups self raising flour
- 1 cup raw caster sugar
- 1 teaspoon cinnamon
- 100g butter, melted
- 1 1/2 cups buttermilk (if you don’t have buttermilk you can use milk with a squeeze of lemon juice in it. I’ve also used a couple of tablespoons of plain yoghurt mixed with milk to make up the right quantity.)
- 2 eggs
- 1 1/2 cups rhubarb, chopped (this needs to be in reasonably small pieces so that they cook through. You don’t want to come across a large chunk of under cooked rhubarb in your muffin)
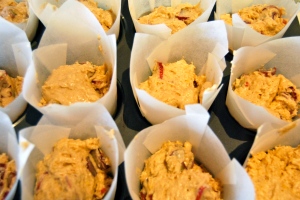
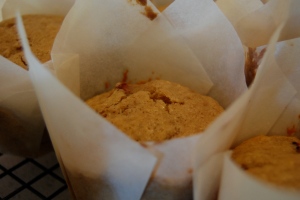
Pre heat the oven to 180 degrees. Place the flour, sugar and cinnamon in a bowl and mix together. In another bowl mix the melted butter, buttermilk and eggs and add this to the dry ingredients. Mix together but don’t over mix – this will make the muffins a bit tough. Fold through the rhubarb. Divide the mixture between 12 muffin cases and bake in the oven for about 25 minutes.
Cool the muffins on a wire tray.
Filed under Quick Breads and Loaves
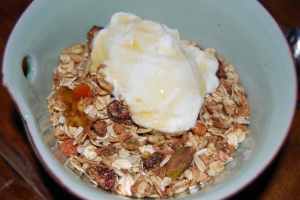
Toasted Muesli
Around 1991 I bought a book called ‘Foodcraft – gift food for gourmets’ by Nerys Purchon. It’s the type of book that probably wouldn’t sell very well today. It’s not written by anyone famous, it’s got very few pictures and even fewer coloured ones and it is seriously dated. I’m fairly sure that it is now out of print. It is however, still one of may favourite books. As Nerys says in the introduction “it’s as much a ‘Storeroom’ recipe book as it is a food gift book.” It is mostly for this purpose that I use it. It has wonderful recipes for mustards and cordials, ginger beers, sweets, chocolates, teas, dressings, pickles – all sorts of things. There are a few recipes that I go back to time and time again and Nerys ‘Golden Granola’ is one of them.
After reading in the newspaper a couple of weeks ago that Sanitarium is currently issuing cafes with notices to stop using the term granola on their menus as the word is owned by Sanitarium, I thought it wise to stick with toasted muesli. The original recipe called for buckwheat and oatbran as well as oats but it depends on what I have in the pantry as to what finds its way into my version. Similarly the nuts and dried fruit I use also depends on what I have in. The one part of the recipe that I never change is the peanut butter, honey and oil mixture that is mixed through the muesli before toasting. The quantity of oil isn’t much so don’t worry about including it. The recipe below is as I made it today but feel free to make substitutions.
Nerys’ Toasted Muesli
- 5 cups oats (don’t use quick oats for this)
- 2 cups quinoa flakes
- 2 cups wheatgerm
- 1 cup shredded coconut
- 2 cups raw nuts, chopped if necessary (today I used pistachios, macadamia nuts and pecans)
- 1/2 cup honey
- 1/4 cup canola oil
- 1/4 cup peanut butter (I use the crunchy, unsalted version from the health food shop)
- 2 cups dried fruit, chopped if necessary (cranberries, sultanas, apricots and prunes were what I used today but I have also used figs and dates in other versions)
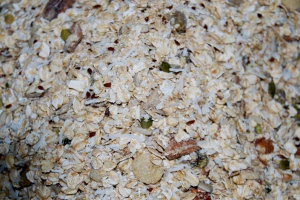
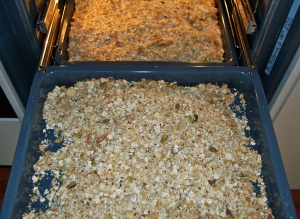
Preheat the oven to 200 degrees. Mix the oats, quinoa flakes, wheatgerm, coconut and nuts in a large bowl. Put the honey, canola oil and peanut butter in a small saucepan and melt over a low heat. When it is well combined pour it over the grain mixture and mix it really well. Divide this mixture between a couple of large roasting pans. Put it in the oven to brown. You will need to stir the mixture often while it is cooking and don’t go away and leave it as it will catch very quickly. When the muesli is a golden brown and no longer sticky remove from the oven and cool. To the cooled mixture add the dried fruit and mix until well combined.
I usually make a double batch of toasted muesli each time and keep it in the freezer.
Nerys Purchon also wrote a number of books about herbs and I also have a book of hers called ‘Bodycraft” which has instructions for making your own soap, shampoos, moisturisers and the like. After making the toasted muesli today I decided to google Nerys and learned that she passed away in 2010.
Filed under Pantry Staples
Avocado Loaf
Avocados also came home in the crate from the markets. They were slightly battered and bruised and very ripe. Avocados aren’t very popular in our household. They are just tolerated as guacamole, but in salads they are pushed to the sides of the plate and no one would dream of having avocado on toast. The problem with avocado is that once they are ripe they need eating, they really can’t be preserved in any way that means they are still edible (although apparently if you puree them with some lemon juice you can freeze them). However I came across a recipe for an avocado loaf. It is in one of my older Women’s Weekly cook books called ‘More Cakes and Slices’. Printed in the early 1990s, many of these recipe books have been revamped and modernised and been given a nice shiny new layout. I still prefer my older ones, despite the fact that the covers are falling off and they certainly look dated.
Avocado Loaf
- 125g butter
- 2/3 cup brown sugar
- 2 eggs
- 1 1/2 cups wholemeal self raising flour
- 1 cup mashed avocado
- 1/2 cup walnuts
Line a loaf tin with baking paper and put the oven on at 180 degrees.
Beat the butter and the sugar with an electric mixer until light and fluffy. Add the eggs, one at a time, beating well between each one. Stir in the remaining ingredients. Spread the mixture into a prepared tin and bake for about 1 hour. Let the cake stand in the tin for five minutes before turning it out on a wire rack to cool.
Filed under Quick Breads and Loaves
Green Tomato Chutney
I arrived home from the markets on Saturday with a crate of less than perfect fruit and vegetables. It is one of the things that I love about the markets – the producers and farmers hate waste and so even the unsaleable items find a home. Greg grows mostly bananas on his farm at Kyogle, but he also has a few other bits and pieces and he is very generous in giving away the things he isn’t able to sell. In exchange for a couple of cakes I came home armed with lots of green and under ripe tomatoes, slightly bashed avocados and plenty of bananas. The bananas are easy to deal with – straight into the freezer. They will make their way into cakes over the next few weeks. The tomatoes are ideal for chutney.
I don’t think that you can ever have enough chutney. Cheese and chutney sandwiches are one of my favourites and there isn’t a lentil or chickpea sausage roll that hasn’t been enhanced by the addition of chutney. I don’t mind what type of chutney it is either – whatever is in the pantry is usually suitable. Not only that but chutney is really easy to make. It’s very adaptable to what you have available and very forgiving. It doesn’t need perfect dicing or precise measurement, it really is a matter of throwing it all in a pot and cooking it until it’s thick.
Green tomatoes aren’t as fleshy as fully ripe ones so they need the addition of apples to give the chutney a bit of body. This recipe for Green Tomato Chutney has a bit of a kick from the chilli and a subtle curry flavour.
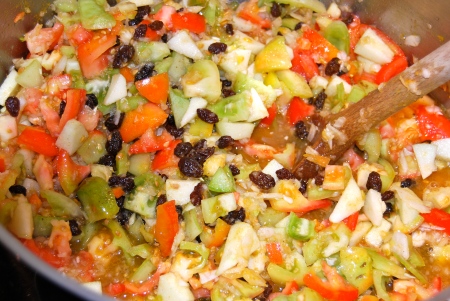
Ready for cooking – the colours are fantastic. You’ll need quite a large pot but it will cook down.
Green Tomato Chutney
- 3kg green or under ripe tomatoes, chopped
- 1kg brown onions, chopped (if you have a food processor this is an ideal time to use it)
- 750g apples, peeled, cored and chopped
- 400g sultanas
- 6 garlic cloves, chopped
- 4 red chillies, finely chopped
- 1 litre white vinegar
- 750g raw sugar
- 2 tablespoons mustard powder
- 2 tablespoons curry powder
- 3 teaspoons salt
Place all the ingredients in a large saucepan. Bring to the boil, stirring occasionally until the sugar dissolves. Continue to gently boil the chutney for about 1 1/2 hours or until the mixture thickens. Pour into sterilised jars and leave it for about a month before you are tempted to eat it. This ensures that the vinegary flavour of the chutney has mellowed. Store in a cool place for up to twelve months.
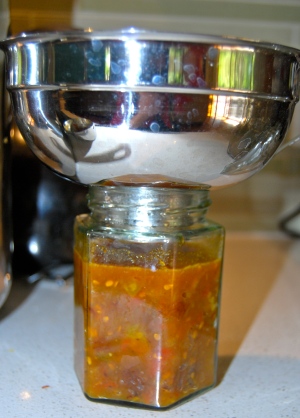
Using a jam funnel makes what can be a very messy job into a much cleaner one. You can purchase a funnel for filling your jars from kitchenware shops.
This made 14 jars, which is quite a bit of chutney. Unless you have lots of friends and relatives to give it away to you can just as easily halve the recipe.
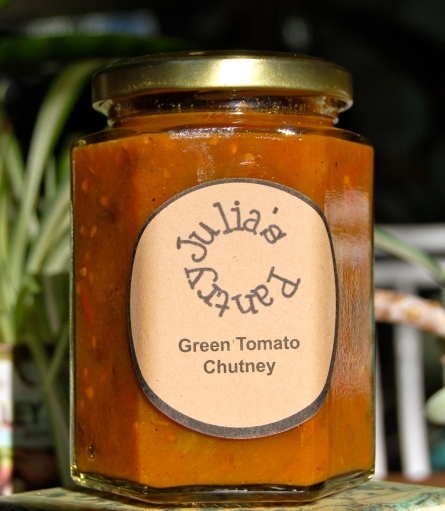
The finished product.


